Table of Contents
- Essential Tools and Technologies for Building a Level Editor
- Defining the Core Features of Your Level Editor
- Designing an Intuitive User Interface for Seamless Interaction
- Implementing the Backend Logic for Level Data Management
- Adding Advanced Features for Customization and Flexibility
- Testing and Debugging Your Level Editor for Optimal Performance
- Strategies for Integrating the Level Editor into Your Game Workflow
Who this article is for:
- Game developers looking to create custom level editors for HTML5 games
- Technical directors and UX designers involved in game development
- Teams interested in user-generated content and collaborative design processes
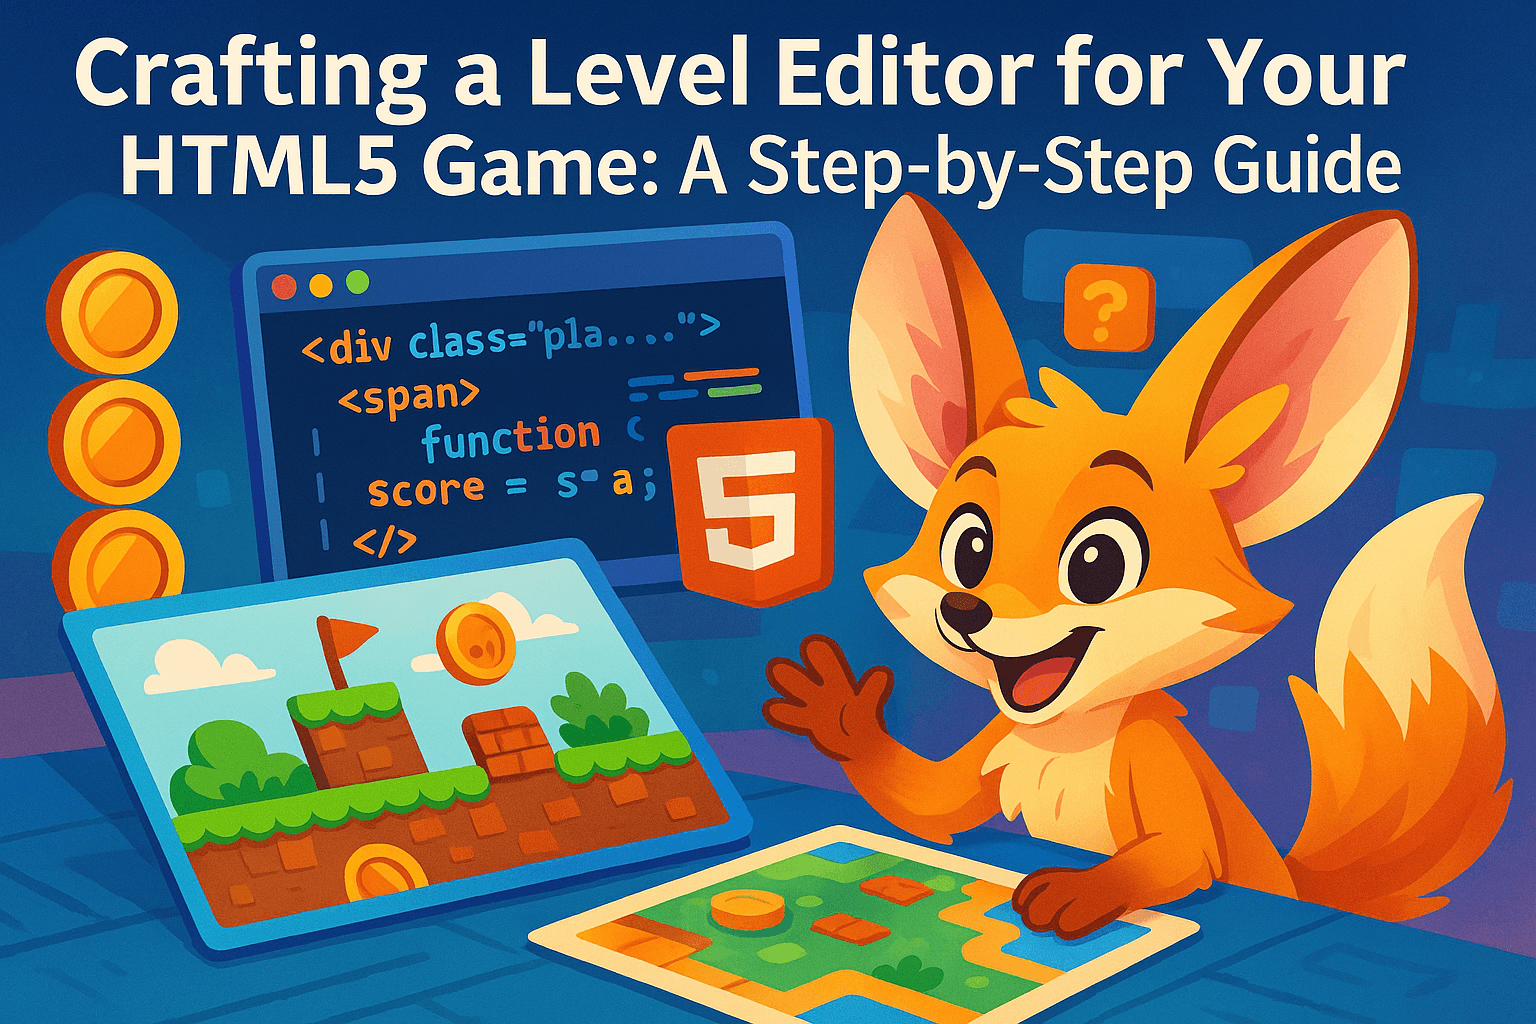
A custom level editor transforms your HTML5 game from a static experience into an ever-evolving playground. Whether you’re building a platformer, puzzle game, or RPG, a bespoke editor empowers you to rapidly iterate designs, outsource level creation to team members with limited coding skills, and potentially unlock user-generated content. In 2025, with browser capabilities reaching new heights, creating your own level editor isn’t just for AAA studios anymore—it’s a practical investment that pays dividends throughout your development cycle. Let’s break down this process into manageable steps that will have you designing, implementing, and integrating a powerful level editor tailored specifically to your game’s unique mechanics.
Play free games on Playgama.com
Essential Tools and Technologies for Building a Level Editor
Before diving into development, you’ll need to assemble the right toolkit. The foundation of any HTML5 level editor is built upon web technologies that balance performance with flexibility. Your choice of frameworks and libraries will significantly impact both development speed and editor capabilities.
For the core technologies, consider these essential components:
- JavaScript Frameworks: React, Vue, or Angular provide reactive UI components ideal for editor interfaces
- Canvas Libraries: PixiJS, Fabric.js, or Three.js for rendering your game’s visual elements
- Input Management: Hammer.js or interact.js for handling drag-and-drop, rotation, and scaling operations
- Data Management: localForage or PouchDB for client-side storage of level data
- Export/Import: FileSaver.js for exporting level designs to JSON, XML, or custom formats
When selecting frameworks, prioritize those that integrate seamlessly with your existing game codebase. Many developers find it advantageous to use the same rendering engine for both their game and editor, reducing the need to write redundant asset loading and rendering code.
| Framework Category | Options | Best For | Performance Impact |
| UI Component Libraries | React, Vue, Svelte | Complex editors with many panels and tools | Medium |
| Canvas Rendering | PixiJS, Phaser, Konva | 2D games with sprite-based graphics | Low-Medium |
| WebGL Rendering | Three.js, Babylon.js | 3D or visually complex 2.5D games | Medium-High |
| Bare Canvas API | Vanilla JS with Canvas API | Simple editors with minimal UI requirements | Very Low |
Beyond these core technologies, consider tools that will accelerate your development process:
- Webpack or Parcel for bundling your editor code alongside your game
- TypeScript for type safety when handling complex level data structures
- ESLint and Prettier to maintain code quality across the editor codebase
- Jest or Mocha for unit testing critical editor functions
Remember that your editor doesn’t need to be web-based, even if your game is. Desktop applications built with Electron can offer performance advantages for complex editors, while still exporting data compatible with your HTML5 game.
Enhance Your Level Editor with Playgama Bridge
While building your custom level editor, consider integrating Playgama Bridge SDK to streamline the publishing process. With a single SDK integration, you can focus on editor development while Playgama handles cross-platform compatibility, monetization, and technical support. The SDK provides tools that make it easier to test levels across multiple platforms without complex setups, allowing you to create, test, and publish seamlessly.
- Simplify cross-platform level testing with unified tools
- Focus on editor features instead of platform-specific implementation
- Access detailed documentation for smooth integration
Defining the Core Features of Your Level Editor
The scope of your level editor should directly reflect the specific mechanics and assets of your game. An overambitious editor with features you’ll never use wastes development time, while an underpowered one creates bottlenecks in your content pipeline. The most successful level editors precisely target the elements that make your game unique.
Start by identifying the fundamental building blocks of your game levels:
- Placement Tools: For positioning entities, tiles, props, or terrain
- Property Editors: For configuring entity behaviors, triggers, and stats
- Testing Tools: For validating level design without leaving the editor
- Layer Management: For organizing visual and logical elements
- Camera Controls: For navigating through your level workspace
For each feature, evaluate its impact on your specific development workflow. A puzzle game might need precise collision testing tools, while an RPG might prioritize scripted event placement and dialogue triggers.
Sarah Chen, Technical Director
When we were developing “Chrono Rifts,” our time-manipulation puzzle game, we initially designed an editor that mirrored popular tools like Tiled. But we quickly realized this approach wasn’t capturing the temporal mechanics that made our game special. The breakthrough came when we added a timeline scrubber that let level designers preview how objects would move through their time-altered states.
We rebuilt our editor around this concept, adding features like temporal layers and paradox detection. This seemingly small pivot saved us countless hours of debugging impossible puzzles and let our designers create much more intricate challenges than we’d initially planned. The most effective features often don’t come from imitating existing editors, but from deeply analyzing what makes your game unique.
When prioritizing features, use this framework to evaluate each potential tool:
| Feature Category | Impact on Content Creation | Development Complexity | Priority Level |
| Essential Game Elements | Critical – Cannot create levels without | Varies by game | Must-have |
| Time-saving Tools | High – Significantly speeds up workflow | Medium | High |
| Quality Assurance Features | Medium – Reduces errors and testing time | Medium-High | Medium |
| “Nice-to-have” Features | Low – Adds polish but not essential | Varies | Low |
Consider implementing these core features in phases, starting with the absolute essentials your level designers need to be productive. Each subsequent phase can introduce more sophisticated tools that enhance efficiency or enable more complex designs.
Designing an Intuitive User Interface for Seamless Interaction
The interface of your level editor serves as the bridge between your team’s creative vision and technical implementation. A well-designed UI accelerates workflow, reduces errors, and lowers the learning curve for new team members. For HTML5 level editors, where screen real estate may be limited, thoughtful UI design becomes even more critical.
Start with these fundamental UI principles adapted for level editor interfaces:
- Modal vs. Direct Manipulation: Decide whether tools operate in modes (e.g., “place enemies” mode) or through direct selection and manipulation
- Command Visibility: Make common actions immediately visible while grouping specialized tools logically
- Consistent Patterns: Apply uniform interaction patterns across similar tools
- Visual Feedback: Provide clear visual cues for selections, valid placements, and errors
- Keyboard Shortcuts: Implement comprehensive shortcuts for power users without hiding functionality
Most effective level editors combine a main canvas workspace with contextual panels that adapt based on the current selection or operation. Consider this typical layout structure:
+------------------------------------------------------+
|  Toolbar (common actions)                            |
+------------+---------------------------+-------------+
|            |                           |             |
|            |                           |             |
| Asset      |                           | Properties  |
| Library    |       Canvas Area         | Panel       |
|            |                           |             |
|            |                           |             |
+------------+---------------------------+-------------+
|  Status Bar / Console                                |
+------------------------------------------------------+
When implementing this UI structure in HTML5, leverage CSS Grid or Flexbox for responsive layouts that adapt to different screen sizes. Consider making panels resizable or collapsible to maximize canvas workspace on smaller displays.
For the interactive elements, focus on these implementation details:
- Canvas Controls: Implement pan, zoom, and selection controls that feel natural and responsive
- Drag and Drop: Ensure smooth, accurate placement with snapping and alignment guides
- Context Menus: Provide contextual right-click menus for common operations on selected elements
- Undo/Redo: Implement a robust history system that covers all editor operations
- Tooltips and Help: Add discoverable guidance without cluttering the interface
Miguel Rodriguez, UX Designer
When we redesigned the level editor for our tower defense game “Quantum Siege,” we started by watching our designers work with the original version. What we discovered was eye-opening: they were spending over 60% of their time switching between tools and adjusting properties rather than actually designing levels.
We completely reimagined the interface around a contextual “smart tool” that adapted based on what the designer was doing. Hovering over towers would show range indicators automatically. Dragging paths would suggest optimal enemy routes. We reduced the number of explicit tool selections by 70% and cut level creation time in half.
The most important lesson wasn’t about any specific feature—it was about observing real workflows and eliminating friction points. Your level editor UI should fade into the background, becoming an almost invisible extension of your design team’s creative process.
Remember that your editor’s UI should evolve based on user feedback and changing game requirements. Plan for this evolution by implementing a component-based architecture that allows features to be added, modified, or removed without requiring a complete redesign.
Implementing the Backend Logic for Level Data Management
The backbone of any level editor is its data management system—how level content is represented, stored, validated, and synchronized with your game. A well-architected data layer ensures that levels created in your editor transition seamlessly into your game while preserving all intended behaviors.
When designing your level data structure, consider these fundamental approaches:
- Entity-Component System: Flexible, composable approach where game objects are entities with attached component data
- Layer-Based Structure: Organization of elements into visual or logical layers (background, interactive, foreground)
- Grid-Based System: For tile-based games with regular spatial organization
- Scene Graphs: Hierarchical organization where objects can have parent-child relationships
Your data model should align with how your game engine processes level data. If your game uses a component system for entities, your editor should structure data similarly to avoid complex translations between formats.
For persistent storage, implement a comprehensive save system with these capabilities:
// Example level data structure using an entity-component approach
{
  "version": "1.2.0",
  "metadata": {
    "name": "Forest Ambush",
    "author": "DevTeam",
    "created": "2025-04-15T10:30:00Z",
    "lastModified": "2025-04-16T14:22:10Z"
  },
  "settings": {
    "width": 2048,
    "height": 1024,
    "gravity": 980,
    "backgroundImage": "forest_bg.png"
  },
  "entities": [
    {
      "id": "player_spawn",
      "type": "spawnPoint",
      "position": { "x": 128, "y": 512 },
      "properties": {
        "spawnDirection": "right"
      }
    },
    {
      "id": "enemy_1",
      "type": "enemy",
      "position": { "x": 800, "y": 490 },
      "components": {
        "patrol": {
          "path": [
            { "x": 800, "y": 490 },
            { "x": 1200, "y": 490 }
          ],
          "speed": 150
        },
        "combat": {
          "health": 100,
          "damage": 25,
          "detectRange": 350
        }
      }
    }
  ],
  "tilemap": {
    "tilesize": 64,
    "layers": [
      {
        "name": "ground",
        "data": [0, 0, 0, 1, 1, 1, 0, 0, ...]
      }
    ]
  }
}
Implement these key data management features:
- Autosaving: Periodic background saving to prevent work loss
- Versioning: Schema versioning to manage evolving level formats as your game develops
- Import/Export: Clean serialization to JSON or other formats for easy sharing
- Validation: Data integrity checks to prevent broken levels
- Conflict Resolution: Handling for simultaneous edits in collaborative environments
Monetize Your Game with Level Editor Content
Playgama Partners offers a compelling way to monetize user-generated content from your HTML5 level editor. By embedding the simple widget on your game’s website, you can earn up to 50% of revenue from your game and its user-created levels. This seamless integration enhances your level editor ecosystem by providing:
- A revenue stream from user-created levels without complex setup
- Detailed analytics to track which levels perform best
- Increased user engagement as players share and play each other’s creations
For advanced level editors, consider implementing these backend features:
| Feature | Implementation Approach | Benefit |
| Level Templates | Base patterns that can be quickly customized | Accelerates content creation for common level types |
| Component Libraries | Reusable prefabs combining multiple entities | Creates consistent gameplay elements across levels |
| Cloud Synchronization | Backend server storage with client synchronization | Enables team collaboration and backup security |
| Asset Management | Integration with resource loaders and optimizers | Ensures levels reference available assets correctly |
| Undo Tree (not just linear) | Branching history graph with named states | Supports exploration of multiple design alternatives |
When implementing the backend logic, carefully consider the relationship between your editor data model and runtime game data. While they should share conceptual structure, the runtime version might require optimization transformations to improve performance in-game.
Adding Advanced Features for Customization and Flexibility
Once your level editor’s core functionality is solid, advanced features can dramatically enhance its capabilities, allowing for more sophisticated level designs and improved workflows. These advanced features transform a basic placement tool into a true level design powerhouse.
Consider implementing these high-impact advanced features:
- Visual Scripting System: Node-based tools for creating complex behaviors without code
- Path and Spline Editors: For defining movement patterns, camera tracks, or terrain features
- Environmental Rule Systems: For procedural placement or automatic constraints (e.g., “grass appears near water”)
- Conditional Logic Editors: For quest design, triggers, and event sequences
- Integrated Testing Tools: For validating gameplay directly within the editor
Visual scripting systems deserve special attention, as they can dramatically expand what non-technical team members can accomplish. A well-designed visual scripting interface allows designers to create sophisticated behaviors through connected nodes representing triggers, conditions, and actions.
// Pseudocode for implementing a simple visual script node
class TriggerNode extends ScriptNode {
  constructor() {
    super();
    this.inputs = [];  // No inputs for trigger nodes
    this.outputs = [{
      name: "Triggered",
      type: "execution"
    }];
    this.properties = {
      triggerType: "proximity", // proximity, interaction, timer
      targetEntity: null,
      range: 100
    };
  }

  execute(runtime) {
    // Logic to check if trigger condition is met
    if (this.checkCondition(runtime)) {
      // Activate the next node in the execution chain
      this.triggerOutput("Triggered", runtime);
    }
  }

  checkCondition(runtime) {
    switch(this.properties.triggerType) {
      case "proximity":
        const playerPos = runtime.getPlayerPosition();
        const targetPos = runtime.getEntityPosition(this.properties.targetEntity);
        const distance = calculateDistance(playerPos, targetPos);
        return distance <= this.properties.range;
      // Additional cases for other trigger types
    }
  }
}
Beyond scripting, consider these additional advanced features to enhance your level editor's flexibility:
- Custom Property Editors: Specialized interfaces for editing specific types of gameplay properties
- Event Sequencers: Timeline-based tools for choreographing complex sequences
- Integrated Animation Tools: For adjusting animations directly within level context
- AI Behavior Editors: For configuring enemy or NPC behavior patterns
- Heat Maps and Analytics: For visualizing playtest data directly on level designs
When implementing advanced features, maintain a plugin-based architecture that allows features to be added or removed without disrupting the core editor functionality. This modular approach prevents the editor from becoming bloated while enabling customized toolsets for different team roles.
// Example plugin architecture for editor features
class EditorPlugin {
constructor(editor) {
this.editor = editor;
this.active = false;
}
initialize() {
// Setup plugin resources, register event handlers
}
activate() {
this.active = true;
// Show UI elements, register keyboard shortcuts
}
deactivate() {
this.active = false;
// Hide UI elements, unregister keyboard shortcuts
}
cleanup() {
// Release resources when plugin is removed
}
}
// Path editing plugin example
class PathEditorPlugin extends EditorPlugin {
initialize() {
// Create path editing tools
this.pathPanel = document.createElement('div');
this.pathPanel.className = 'editor-panel path-editor';
this.pathPanel.innerHTML = `
Path Editor
`;
this.editor.ui.sidePanel.appendChild(this.pathPanel);
// Register event handlers
document.getElementById('create-path').addEventListener('click',
() => this.createNewPath());
}
// Additional methods for path editing functionality
}Testing and Debugging Your Level Editor for Optimal Performance
A robust testing and debugging strategy ensures your level editor remains stable and performs well, even as you add features and your team creates increasingly complex levels. For HTML5 level editors, performance considerations become particularly important, as browser environments have different constraints than native applications.
Implement these key testing approaches:
- Unit Testing: Test individual editor components in isolation
- Integration Testing: Verify that components work together correctly
- Performance Testing: Measure editor responsiveness with large or complex levels
- Cross-browser Testing: Ensure compatibility across major browsers
- User Testing: Observe actual level designers using your tools
When debugging level editor issues, implement these specialized tools:
- Enhanced Logging: Detailed console output for editor operations
- Real-time Performance Metrics: FPS counters, memory usage, and operation timing
- Level Validation: Automated checks for common level design errors
- State Inspection: Tools to examine the editor's internal data structures
- Playtest Recording: Capture and replay level testing sessions
For HTML5-specific performance optimization, focus on these critical areas:
// Example performance monitoring system for canvas operations
class PerformanceMonitor {
  constructor() {
    this.metrics = {
      frameTime: [],
      renderTime: [],
      updateTime: [],
      memoryUsage: []
    };
    this.maxSamples = 100;
    this.enabled = true;
  }

  beginMeasure(metricName) {
    if (!this.enabled) return;
    this[`${metricName}Start`] = performance.now();
  }

  endMeasure(metricName) {
    if (!this.enabled || !this[`${metricName}Start`]) return;

    const duration = performance.now() - this[`${metricName}Start`];
    this.metrics[metricName].push(duration);

    // Keep only the most recent samples
    if (this.metrics[metricName].length > this.maxSamples) {
      this.metrics[metricName].shift();
    }

    delete this[`${metricName}Start`];
    return duration;
  }

  getAverageMetric(metricName) {
    const values = this.metrics[metricName];
    if (!values.length) return 0;

    const sum = values.reduce((total, value) => total + value, 0);
    return sum / values.length;
  }

  captureMemorySnapshot() {
    if (!this.enabled || !window.performance || !performance.memory) return;

    this.metrics.memoryUsage.push(performance.memory.usedJSHeapSize);
    if (this.metrics.memoryUsage.length > this.maxSamples) {
      this.metrics.memoryUsage.shift();
    }
  }

  displayMetrics(container) {
    if (!container) return;

    container.innerHTML = `
      Frame: ${this.getAverageMetric('frameTime').toFixed(2)}ms
      Render: ${this.getAverageMetric('renderTime').toFixed(2)}ms
      Update: ${this.getAverageMetric('updateTime').toFixed(2)}ms
      Memory: ${(this.metrics.memoryUsage[this.metrics.memoryUsage.length - 1] / 1048576).toFixed(2)}MB
    `;
  }
}
Monitor these specific performance aspects in your HTML5 level editor:
| Performance Aspect | Common Issues | Optimization Strategies |
| Canvas Rendering | Slow FPS when viewing large levels | Layer caching, viewport culling, resolution scaling |
| DOM Operations | UI sluggishness with many elements | Virtual lists, element recycling, throttled updates |
| Data Processing | Lag during level save/load operations | Web Workers, incremental processing, data indexing |
| Memory Usage | Growing memory consumption over time | Object pooling, texture atlases, explicit garbage collection |
| Input Handling | Delayed response to user interactions | Event delegation, debouncing, prediction |
Implement these automated testing approaches to maintain editor quality:
- Snapshot Testing: Compare editor states before and after operations
- Visual Regression Testing: Detect unintended UI changes
- Load Testing: Verify behavior with artificially large levels
- Playback Testing: Replay recorded editor sessions to verify fixes
Remember that testing should happen continuously throughout development, not just before release. Integrate testing into your development workflow to catch issues early when they're easier to resolve.
Strategies for Integrating the Level Editor into Your Game Workflow
The true value of a level editor emerges when it seamlessly integrates with your overall game development workflow. A well-integrated editor accelerates iteration, improves team collaboration, and ensures that level designs are accurately implemented in the final game.
Consider these integration strategies to maximize your editor's effectiveness:
- Runtime Integration: Allow the editor to run alongside the game for real-time testing
- Continuous Data Synchronization: Ensure level data flows smoothly between editor and game
- Asset Pipeline Integration: Connect editor to asset management systems
- Version Control Workflow: Establish practices for managing level files in source control
- Build System Integration: Include level processing in game build pipelines
For team collaboration, implement these specific workflow enhancements:
- Role-based Interfaces: Customize editor views for different team members (designers, artists, programmers)
- Review Tools: Add annotation and feedback systems for design reviews
- Change Tracking: Visualize what's changed between level versions
- Level Metrics: Provide analytics on level characteristics for balance discussions
To ensure level data integrity throughout the pipeline, implement these safeguards:
// Example level validation system
class LevelValidator {
  constructor() {
    this.rules = [];
    this.setupStandardRules();
  }

  setupStandardRules() {
    // Add standard validation rules
    this.addRule({
      name: "Player Spawn Required",
      description: "Level must have exactly one player spawn point",
      validate: (levelData) => {
        const spawns = levelData.entities.filter(e => e.type === "playerSpawn");
        return {
          valid: spawns.length === 1,
          message: spawns.length === 0 ?
            "Level missing player spawn point" :
            "Level has multiple player spawn points"
        };
      }
    });

    this.addRule({
      name: "Exit Required",
      description: "Level must have at least one exit point",
      validate: (levelData) => {
        const exits = levelData.entities.filter(e => e.type === "exit");
        return {
          valid: exits.length > 0,
          message: "Level has no exit points"
        };
      }
    });

    // Additional rules for game-specific requirements
  }

  addRule(rule) {
    this.rules.push(rule);
  }

  validateLevel(levelData) {
    const results = {
      valid: true,
      errors: [],
      warnings: []
    };

    for (const rule of this.rules) {
      const result = rule.validate(levelData);
      if (!result.valid) {
        results.valid = false;
        results.errors.push({
          rule: rule.name,
          message: result.message
        });
      }
    }

    return results;
  }
}
For a seamless workflow, consider these advanced integration approaches:
- Live Level Linking: Update running game instances when level changes occur in the editor
- Playtest Data Collection: Gather metrics from playtests to inform level refinement
- Automated Level Processing: Apply optimization or analysis passes during the export process
- Modular Level Components: Enable sharing and reuse of level segments across projects
Finally, consider formalizing your level design workflow with these process improvements:
- Level Design Documentation: Templates for capturing design intent alongside level data
- Milestone Reviews: Structured checkpoints for evaluating level progression
- Difficulty Grading: Systems for assessing and balancing level challenge
- Player Experience Mapping: Tools for visualizing the emotional journey through levels
Remember that integration isn't just technical—it's about creating a smooth human workflow that supports your team's creative process while maintaining technical quality standards. The most successful editor integrations balance flexibility with structure, allowing for creative exploration while preventing common issues.
A custom level editor is much more than a technical tool—it's the creative workshop where your game's experiences take shape. The time invested in building a tailored editor pays dividends throughout development and potentially beyond release. As you implement your editor, remember that its true purpose is to empower creativity, streamline iteration, and ensure that your game's unique mechanics shine through in every level. The most successful editors grow organically with your project, adapting to the team's emerging needs while maintaining a consistent foundation. Start simple, focus on your game's core mechanics, and let your editor evolve into the perfect instrument for crafting the experiences that will make your game memorable.
