Unity is a powerful and versatile game engine and with the right setup, it can produce highly optimized WebGL builds. While a default empty project may start around 7-8 MB, proper configuration and asset management can significantly reduce file size-making it possible to meet the strict load-time and size requirements of platforms like FB Instant Games or MSN.
But here’s the good news: with smart configuration and deep understanding of how Unity compiles and packages WebGL builds, you can bring that size down to just 2 MB, without sacrificing stability or core functionality.
Play free games on Playgama.com
This guide dives into exactly how to strip Unity to its barebones, eliminate unnecessary engine modules, trim code, compress assets, and configure the build pipeline to get a minimal WebGL export. We’ll cover:
- Disabling unused engine features and modules
- Removing code stripping blockers and ensuring safe managed stripping
- Fine-tuning PlayerSettings, and IL2CPP settings
- Using correct compression format for Builds / Images / Sounds, etc
- Setting up an efficient template and build structure
Whether you’re building a hyper-casual web game or trying to squeeze your prototype onto a 5MB cap platform, these techniques will help you shrink Unity to its lightest form possible.
This walkthrough is performed on an empty Unity project to isolate the effect of each change. (See “Experiment details” below for Unity version, scripting backend, and compression settings used.)
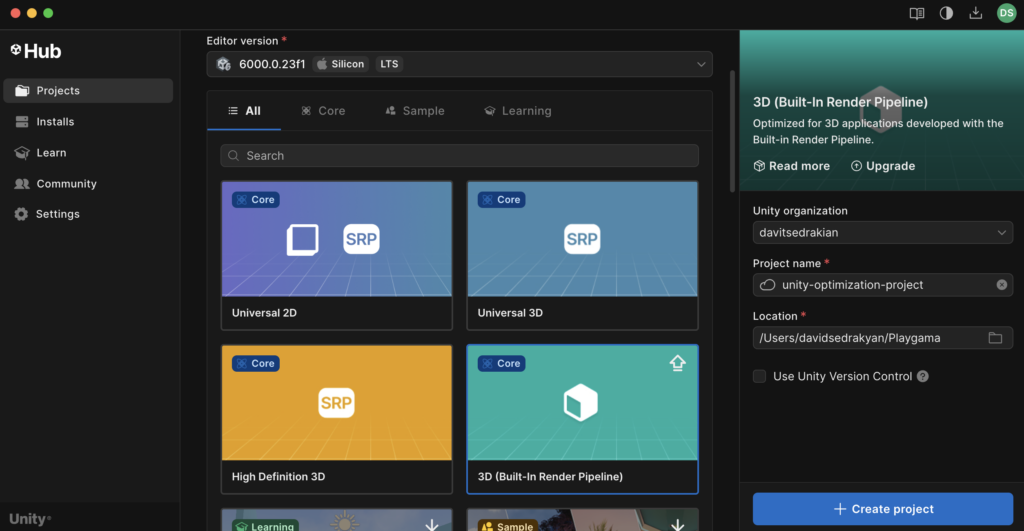
Step 1: Create an empty Unity project for WebGL
(we will use Unity 6000.0.23f1 + Built-In Render Pipeline)
Step 2: Switch platform to WebGL and create a build
(we are doing this to understand initial build size of Unity WebGL projects with default settings)
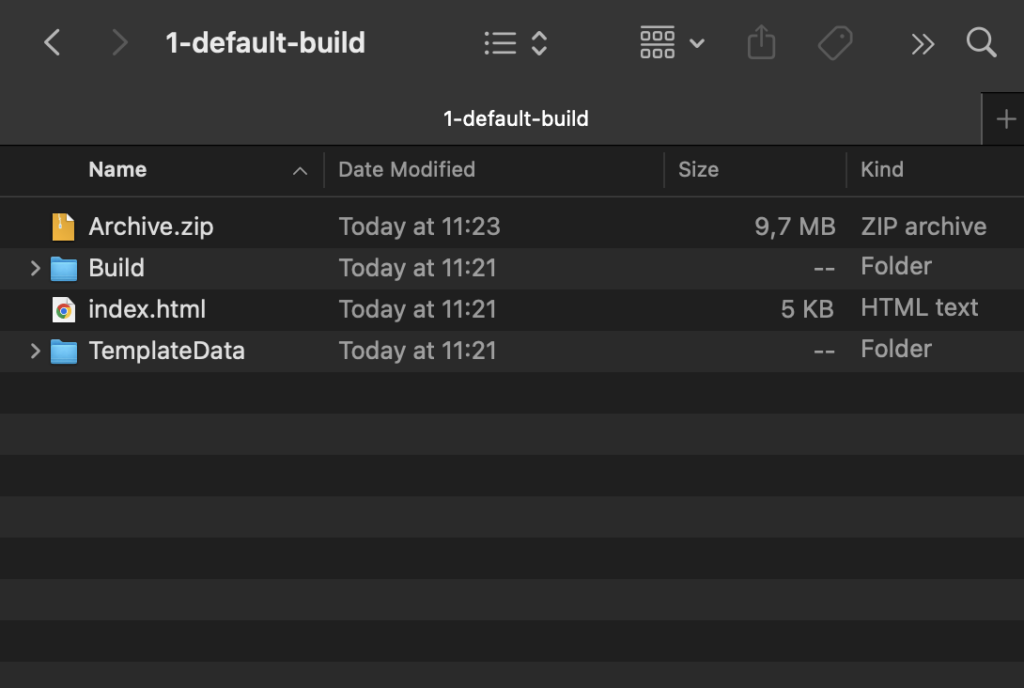
We can see that initial build is around 9.7 MB (which is quiet too much for WEBGL). In this example we haven’t changed anything yet, obviously if we change compression and other settings we can shrink build size (that’s what we will do in the next steps).
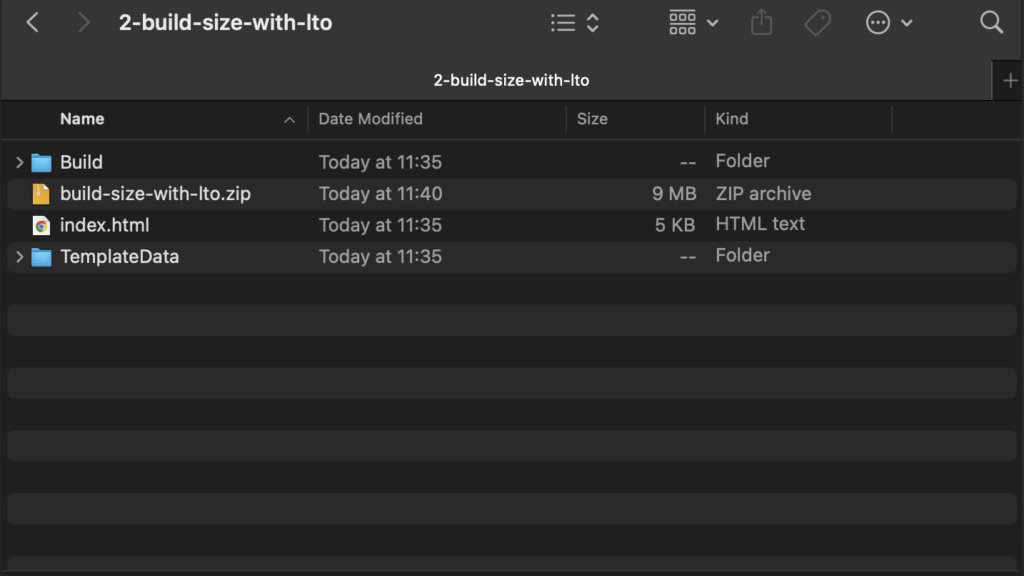
Step 3: Go to build settings and change “Code Optimization: Build Size with LTO”
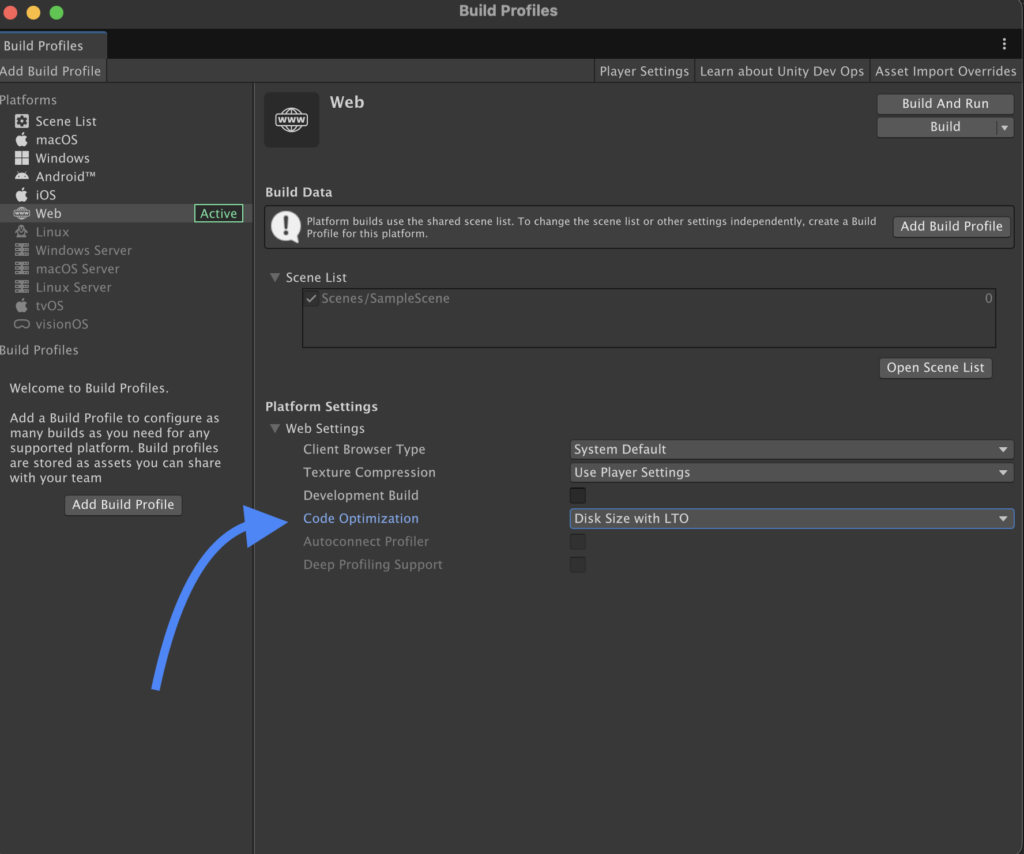
Boom! We already have 9MB build size.
Step 4: Let’s dive deep in Player settings and optimize it.
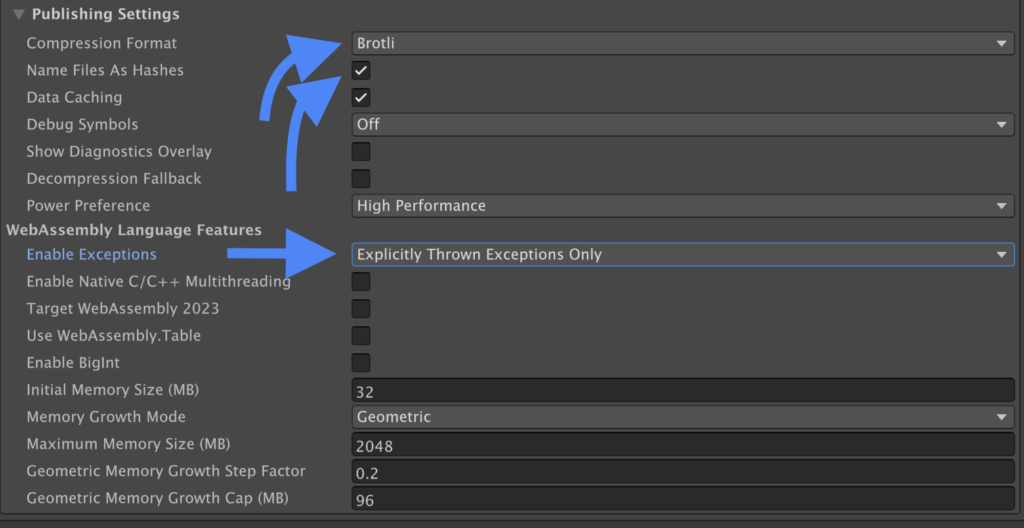
Let’s change Compression to “Brotli” and enable “Name files as Hashes” checkbox in Menu, screenshot with settings is below
Next we are creating the next build…

Now it’s 6.8mb so we are already optimized Unity build from 9.7mb to 6.8mb! Let’s go further.
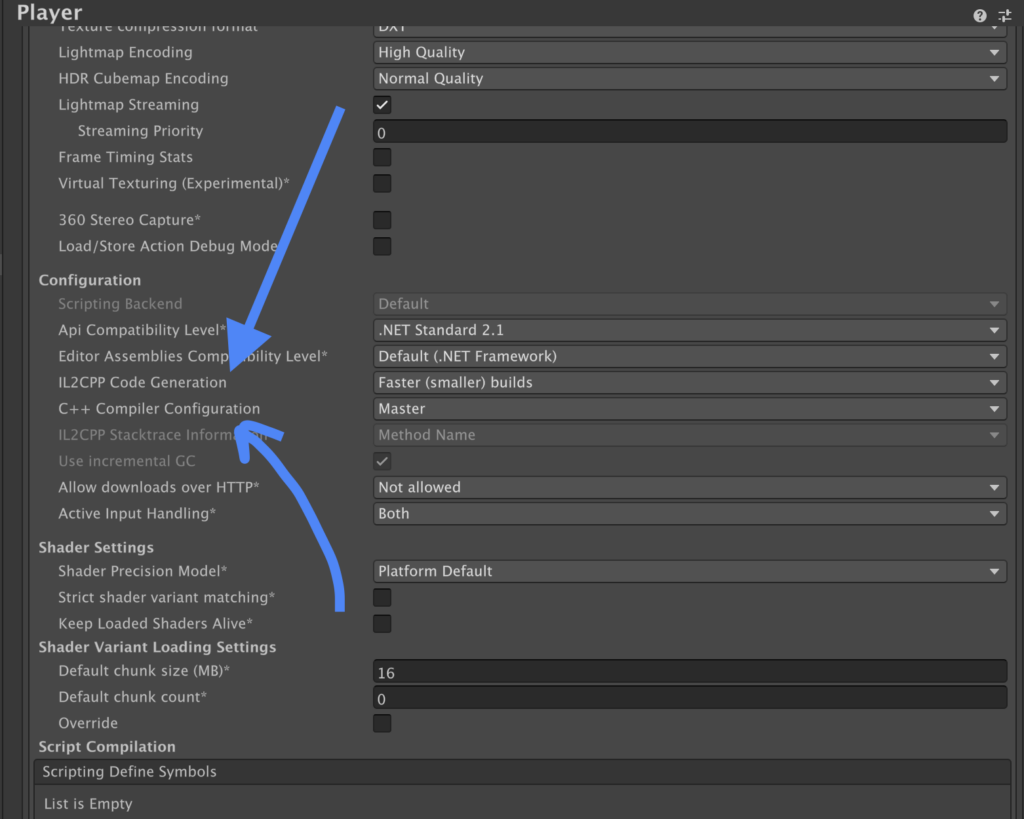
Step 5: Now let’s change IL2CPP Code Generation to “Smaller Builds” and change C++ Compiler Configuration to Master
Now we have 6.2MB build size!
Step 6: Texture compression ASTC / DXT / ETC2
In our case, there will be no difference, because we don’t use textures in current build, but depending on the platforms you can choose what suits for you. Generally we always recommend to turn on crunch compression on textures. We will not do new build here, because it will not change anything
Step 7: If your game allows, you can change Color Space: Gamma, it will save additional 100kb for the build
Please be cautious, because rendering will change significantly, and personally Color Space: Linear looks much better
Step 8: Strip Engine Code
Managed Striping Level: High (for this settings please be cautious, because sometimes it can “strip” needed code for your game, please test after enabling this checkbox)
! Also enable texture mipmap stripping
Yeeeey! We are almost there, now we have 4.6MB build, 2 more MBs and we finish our optimization journey. Let’s remove unneeded packages from the project and remove unneeded quality settings.
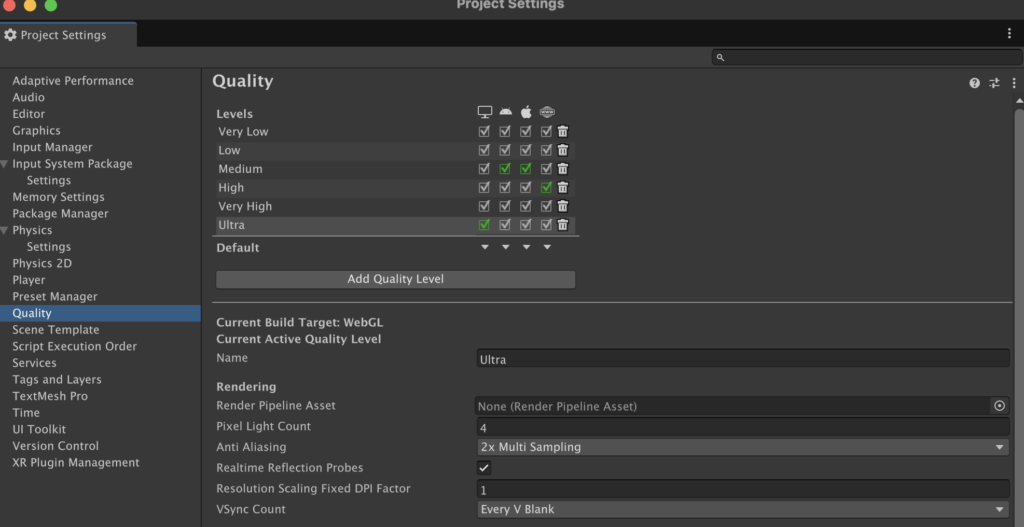
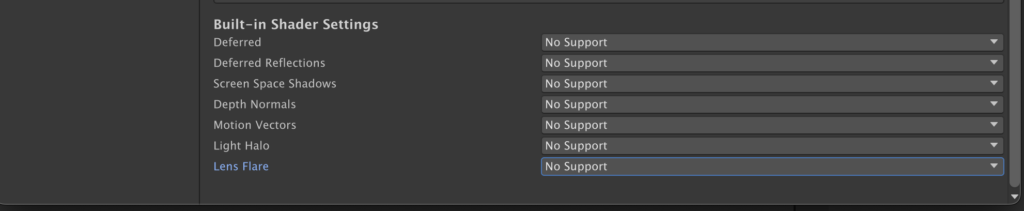
Remove Graphic Settings and set to low (for example if you use “shadows” it will be better to fully disable built-in shaders and create custom “blob” shadow system)
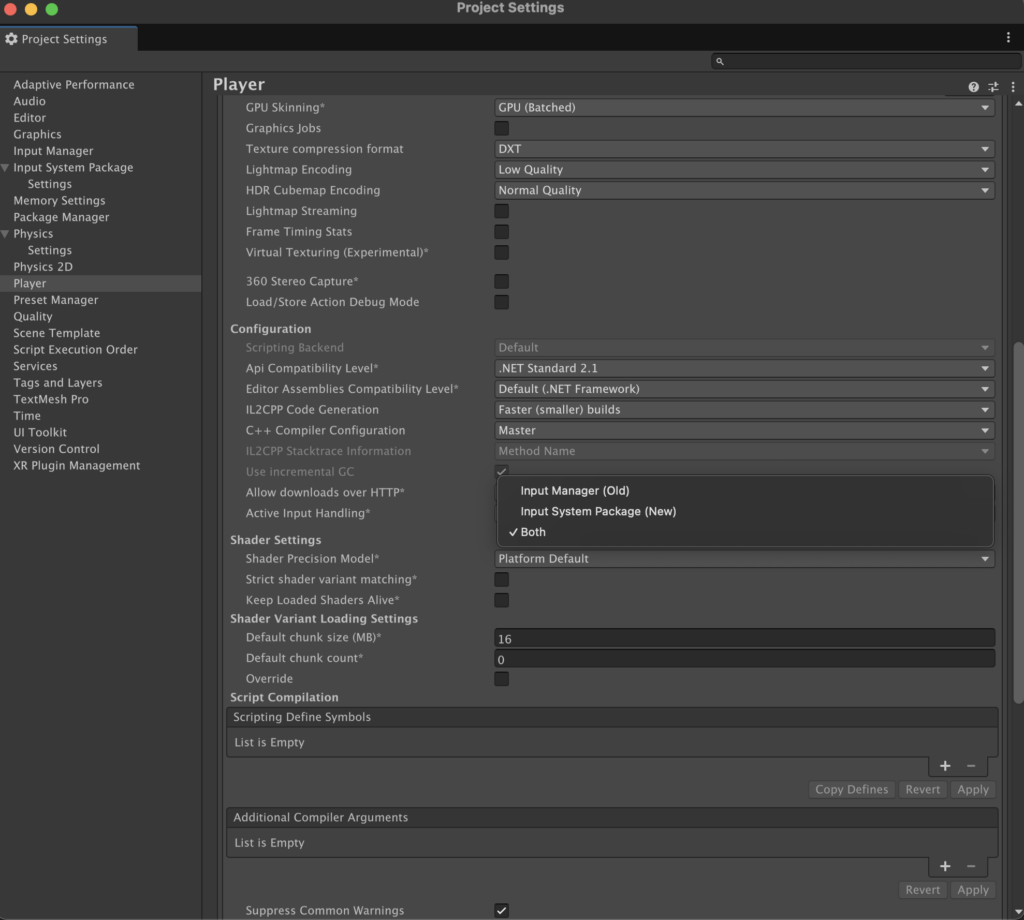
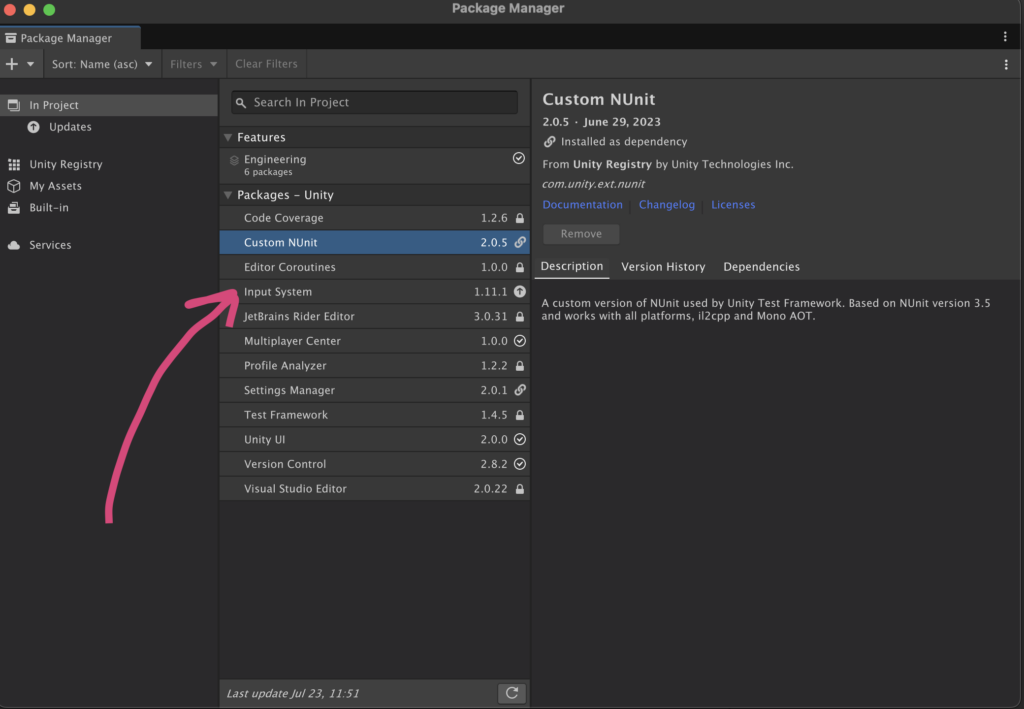
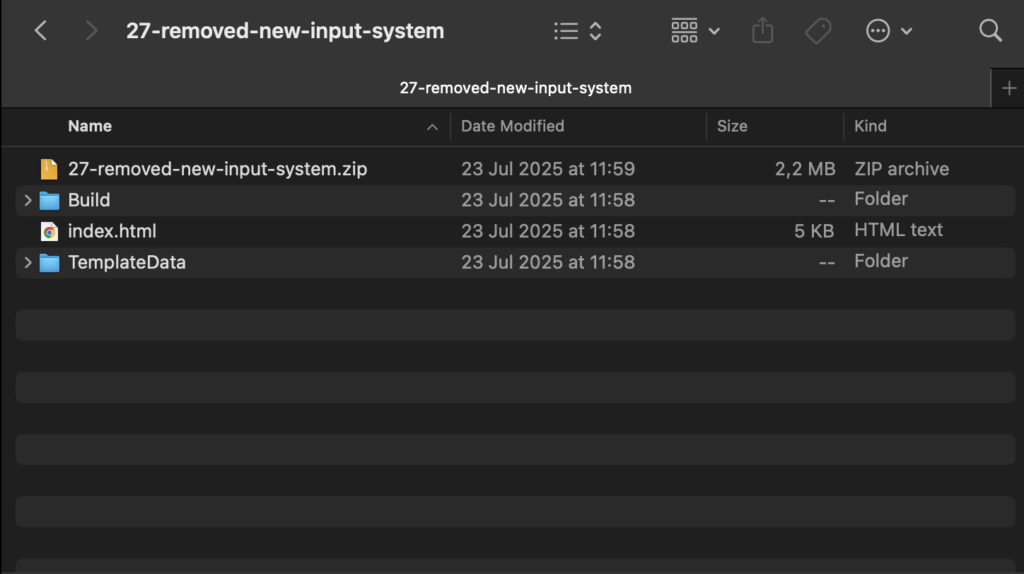
For example, “New Input System” – is actually around 2.4 MB, so if you don’t use it, please remove New Input System Package, like in screenshot below, and finally we will get 2.2MB Unity WebGL Build I encourage use “Old Input System” – because 2.4MB is quiet big for web projects.

And finally let’s do a final build and we have 2.2mb here, that’s quiet good for WEBGL.
Your actual game will be bigger, because you will use textures / code / shaders / models, etc. But now being under 5 or 10 MB is much more achievable!
Best of luck from Playgama team

Great write up! If you are interested you can also check out the „Web Stripping Tool“ package to further optimize the code size: https://docs.unity3d.com/Packages/com.unity.web.stripping-tool@1.2/manual/index.html
It uses profiling to identify unused code during runtime(in addition to the code stripping during build). On an empty project you will probably only see smaller gains but on more complex projects some pretty good results can be achieved.